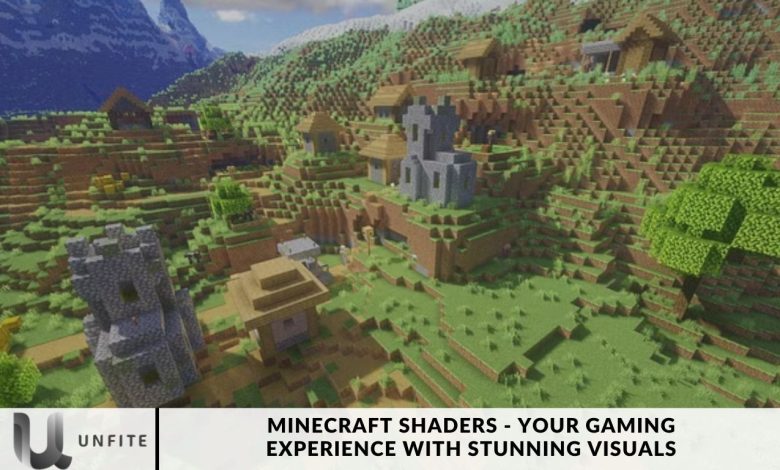
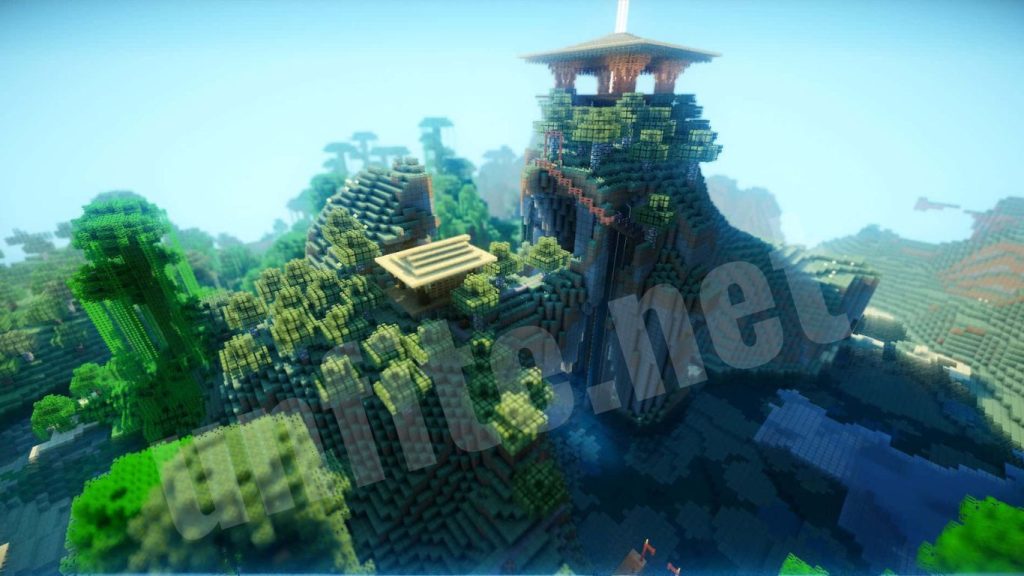
Minecraft, known for its blocky graphics and expansive worlds, offers players an endless canvas for creativity. However, while the game’s visuals are iconic, they can feel somewhat basic compared to modern games. This is where Minecraft shaders come into play. Shaders are graphical mods that enhance the visual fidelity of Minecraft by introducing realistic lighting, shadows, water reflections, and much more. These enhancements can transform the game’s appearance, making it look more vibrant and immersive.
Shaders Important for Minecraft Players?
For many players, shaders are not just a visual upgrade but a way to deepen their connection with the game. The enhanced graphics can make exploring biomes, building structures, and battling mobs more engaging. Additionally, shaders allow players to tailor the game’s aesthetics to their preferences, creating a more personalized gaming experience.
How Minecraft Shaders Work
The Technology Behind Shaders
Minecraft shaders work by manipulating the game’s rendering engine. They alter how light, shadows, and other visual effects are processed, creating a more realistic or stylized look. Shaders achieve this by using GLSL (OpenGL Shading Language), a programming language specifically designed for graphics rendering. Each shaderpack contains a set of scripts that tell the game how to render various visual elements differently.
Understanding Shaderpacks
Shaderpacks are collections of shader scripts bundled together. These packs are typically designed to achieve a specific visual style, such as realistic lighting, cartoonish visuals, or cinematic effects. Players can download shaderpacks from various sources and install them to change the look of their Minecraft world instantly.
Types of Minecraft Shaders
Basic Shaders
Basic shaders offer a slight improvement over Minecraft’s vanilla graphics without drastically altering the game’s performance. These shaders might add simple effects like dynamic shadows or improved lighting, making them suitable for players with low-end PCs or those who prefer subtle changes.
Advanced Shaders
Advanced shaders provide a more noticeable upgrade to Minecraft’s visuals. They introduce features like volumetric lighting, detailed shadows, and enhanced water reflections. These shaders require more powerful hardware but significantly improve the game’s aesthetics.
Ultra Realistic Shaders
For players who want Minecraft to look as realistic as possible, ultra-realistic shaders are the way to go. These shaders mimic real-world lighting, complete with photorealistic water, intricate shadow patterns, and lifelike textures. However, they are also the most demanding on system resources.

Top Minecraft Shaders in 2024
SEUS (Sonic Ether’s Unbelievable Shaders)
SEUS is one of the most popular and long-standing shaderpacks available. Known for its breathtaking visuals, SEUS offers realistic lighting, dynamic shadows, and gorgeous water effects. It’s a great choice for players looking to transform Minecraft into a visual masterpiece.
Sildur’s Vibrant Shaders
Sildur’s Vibrant Shaders offer a balance between performance and visual quality. They are highly customizable, allowing players to tweak settings to match their hardware capabilities. The vibrant colors and dynamic lighting make this shaderpack a favorite among many Minecraft players.
BSL Shaders
BSL Shaders are renowned for their beautiful skyboxes, realistic water, and smooth performance. This shaderpack offers a blend of realism and performance, making it a versatile choice for many different types of players.
Chocapic13’s Shaders
Chocapic13’s Shaders are known for their stunning lighting effects and smooth performance. This shaderpack is optimized for both high-end and low-end systems, providing a great visual experience without sacrificing too much performance.
KUDA Shaders
KUDA Shaders are praised for their realistic lighting and shadow effects. They add a warm glow to the game, creating a cozy and inviting atmosphere. This shaderpack is also highly customizable, allowing players to adjust settings to their liking.
Complementary Shaders
Complementary Shaders are designed to be a well-rounded shaderpack that complements Minecraft’s natural aesthetics. They offer a mix of realistic lighting, shadows, and vibrant colors, making them a great choice for players who want an all-in-one solution.
Oceano Shaders
As the name suggests, Oceano Shaders focus on creating stunning water effects. The water in Minecraft looks incredibly realistic with this shaderpack, complete with reflective surfaces and realistic wave patterns. Oceano Shaders also enhance lighting and colors, making the entire game world feel more vibrant.
Continuum Shaders
Continuum Shaders are among the most advanced shaderpacks available. They offer photorealistic lighting, shadows, and reflections, transforming Minecraft into a visual spectacle. However, these shaders are very demanding on hardware, making them best suited for high-end gaming PCs.
Voyager Shaders
Voyager Shaders are designed to create a cinematic experience in Minecraft. They offer dramatic lighting effects, realistic shadows, and stunning water reflections. This shaderpack is perfect for players who want to capture breathtaking screenshots or record high-quality gameplay videos.
How to Install Minecraft Shaders
System Requirements for Shaders
Before installing shaders, it’s important to ensure your PC meets the necessary requirements. Shaders can be demanding on hardware, so players with low-end machines may need to adjust settings or opt for lightweight shaderpacks.
Minimum Requirements:
- CPU: Intel Core i3 or equivalent
- GPU: NVIDIA GTX 660 / AMD Radeon HD 7870 or equivalent
- RAM: 4 GB
- Minecraft Version: 1.12.2 or later
- Modding API: OptiFine (for shader support)
Recommended Requirements:
- CPU: Intel Core i5 or equivalent
- GPU: NVIDIA GTX 1060 / AMD Radeon RX 580 or equivalent
- RAM: 8 GB or more
- Minecraft Version: 1.16 or later
- Modding API: OptiFine with HD Texture support
Step-by-Step Installation Guide
Install Minecraft and OptiFine: Ensure you have the latest version of Minecraft installed. Download and install OptiFine, a mod that enhances Minecraft’s graphics and allows shaders to work.
Download a Shaderpack: Visit a trusted website to download your desired shaderpack. Popular sources include CurseForge, Planet Minecraft, and the official websites of shader developers.
Move the Shaderpack to Minecraft: Once downloaded, move the shaderpack file into the “shaderpacks” folder located in your Minecraft directory. If the folder doesn’t exist, create one.
Activate the Shaderpack: Launch Minecraft and go to the options menu. Navigate to the “Video Settings” and select “Shaders.” From here, you can choose and activate your shaderpack.
Adjust Settings: Depending on your hardware, you may need to adjust settings within the shaderpack for optimal performance.
Troubleshooting Common Issues
Lag and Low FPS: Reduce the shaderpack quality or adjust Minecraft’s video settings to improve performance.
Graphical Glitches: Ensure that your GPU drivers are up to date and that OptiFine is correctly installed.
Shader Not Showing: Verify that the shaderpack is compatible with your Minecraft version and OptiFine version.
Customizing Your Minecraft Shaders
Customizing Minecraft shaders allows you to tailor the visual experience to your preferences, enhancing specific elements of the game while optimizing performance. Whether you’re looking to adjust lighting, tweak colors, or improve the game’s performance on your system, customization offers the flexibility to create the perfect Minecraft experience.

Adjusting Shader Settings
Most shaderpacks come with a wide range of configurable settings, allowing you to tweak various visual aspects to suit your needs. Here’s a guide to the most common settings you can adjust:
Lighting and Shadows
Brightness: Adjusting the brightness controls the overall lighting in your game. A lower brightness level can create a more immersive, moody environment, while higher brightness can make the game more vibrant.
Shadow Quality: Increasing shadow quality makes shadows more detailed and realistic, but it can also impact performance. If you experience lag, consider lowering the shadow resolution.
Ambient Occlusion: This setting adds depth to objects by enhancing the shading around them. Adjusting ambient occlusion can make objects look more grounded and realistic.
Water Effects
Water Reflection: Enhance the realism of water bodies by enabling or disabling reflections. High-quality reflections look stunning but can be resource-intensive.
Wave Intensity: This setting controls the movement of water surfaces. Adjust the wave intensity to create calm lakes or turbulent oceans.
Sky and Weather
Sky Textures: Some shaderpacks offer custom sky textures that can be toggled on or off. Experiment with different sky textures to find one that complements your gameplay.
Clouds: Adjust the quality and density of clouds in the game. High-density clouds can create a dramatic atmosphere, especially during weather events like storms.
Rain and Snow: Customize the appearance and intensity of rain and snow. You can even change the way these weather effects interact with the environment.
Color Grading and Filters
Color Saturation: Increase or decrease the color saturation to make the game world more vibrant or subdued.
Contrast and Brightness: Fine-tune the contrast and brightness to achieve the desired visual style. High contrast can make the game look more striking, while a balanced contrast creates a more natural look.
Color Filters: Some shaderpacks include color filters that can create specific moods, such as a sepia tone for a vintage look or a cool blue filter for a wintery atmosphere.
Performance Tweaks
Render Distance: Adjusting the render distance can significantly impact performance. Lowering the render distance reduces the load on your system, helping to maintain a smoother frame rate.
Anti-Aliasing: This setting smooths out jagged edges on objects. While it improves visual quality, it can be demanding on your GPU. If you notice performance drops, consider lowering or disabling anti-aliasing.
Anisotropic Filtering: This setting improves the clarity of textures at oblique angles. Like anti-aliasing, it can affect performance, so adjust it based on your system’s capabilities.
Creating Your Own Shaderpacks
If you’re feeling adventurous, you can create your own shaderpacks from scratch or modify existing ones to suit your preferences. Here’s how you can start:
Learn GLSL (OpenGL Shading Language): Understanding GLSL is key to creating custom shaders. There are many online tutorials and resources available that can help you get started with shader programming.
Use Shader Development Tools: Tools like ShaderLab or Shadertoy can help you design and test your shaders. These platforms offer real-time previews, making it easier to see how your changes affect the game.
Modify Existing Shaderpacks: Start by tweaking existing shaderpacks to understand how different settings work. You can open the shader files (usually .fsh or .vsh files) in a text editor and experiment with the values.
Test in Minecraft: Once you’ve made changes, load the shaderpack in Minecraft to see how it looks in-game. Make adjustments as needed to refine your shaderpack.
Share Your Shaderpack: If you’re proud of your work, consider sharing your shaderpack with the community. Websites like CurseForge and Planet Minecraft allow you to upload and distribute your custom shaderpacks.
Tips for Optimization and Performance
Customizing shaders can sometimes lead to performance issues, especially if you’re pushing the limits of your hardware. Here are some tips to optimize your shaders for better performance:
Balance Quality and Performance: While it’s tempting to max out all settings, it’s important to find a balance between visual quality and performance. Experiment with different settings to achieve the best possible look without compromising frame rates.
Use OptiFine: OptiFine is a must-have mod for anyone using shaders. It offers numerous settings that can improve performance, such as dynamic lighting, smooth lighting, and connected textures.
Lower Render Distance: Reducing the render distance is one of the most effective ways to improve performance. It decreases the number of chunks loaded at any given time, reducing the load on your CPU and GPU.
Adjust Resource Packs: High-resolution resource packs can further strain your system when using shaders. Consider using lower-resolution textures or optimizing your resource pack settings.
Update Your Drivers: Ensure that your graphics drivers are up to date. Manufacturers frequently release updates that optimize performance for new games and software, including Minecraft shaders.
Monitor FPS: Use Minecraft’s built-in FPS counter or third-party software to monitor your frame rate. This will help you identify settings that cause performance drops, allowing you to make necessary adjustments.
Minecraft Shaders for Low-End PCs
While Minecraft shaders can greatly enhance the game’s visuals, they often come at a cost—demanding more from your computer’s hardware. However, if you’re using a low-end PC, you don’t have to miss out on the stunning effects that shaders offer. Several shaderpacks are optimized to deliver beautiful visuals without significantly impacting performance. Below is a guide to choosing and using Minecraft shaders on low-end PCs.
Lightweight Shader Options
Several shaderpacks are designed specifically for low-end systems. These shaderpacks provide basic enhancements that improve the look of Minecraft while being light on resources. Here are some popular options:
Sildur’s Vibrant Shaders (Lite Version)
- Overview: Sildur’s Vibrant Shaders offer a Lite version specifically designed for low-end PCs. This version retains many of the stunning lighting effects and vibrant colors that the full version offers but with significantly reduced performance demands.
- Features: Basic shadows, improved lighting, and subtle water reflections.
Performance: Optimized to run smoothly on older systems or PCs with integrated graphics.
Chocapic13’s Toaster Edition
- Overview: Chocapic13’s Shaders are known for their visual quality, and the Toaster Edition is a special version designed for low-spec PCs. It removes some of the more demanding features while still providing noticeable visual improvements.
- Features: Soft shadows, enhanced sky, and improved ambient lighting.
- Performance: Minimal performance impact, making it ideal for very low-end systems.
Tea Shaders
- Overview: Tea Shaders are lightweight and designed to provide a balanced mix of performance and visual enhancements. They focus on subtle improvements rather than dramatic changes, making them perfect for low-end PCs.
- Features: Smooth lighting, basic reflections, and minor shadow enhancements.
- Performance: Extremely low performance cost, designed to work well on older or weaker hardware.
Vanilla Plus Shaders
- Overview: Vanilla Plus Shaders aim to enhance the default Minecraft graphics without overloading your system. They maintain the game’s original aesthetic while adding minor improvements.
- Features: Slightly improved shadows, better lighting, and enhanced sky colors.
- Performance: Runs well on most low-end systems, closely resembling the vanilla Minecraft experience with a slight visual upgrade.
BSL Shaders (Low Version)
- Overview: BSL Shaders are widely praised for their stunning visuals, and the Low version is tailored for low-end systems. It keeps many of the beautiful effects from the full version but optimizes them for performance.
- Features: Enhanced lighting, simple shadows, and improved water.
- Performance: Lower performance impact compared to the standard BSL Shaders, suitable for less powerful PCs.
Tips to Improve Performance on Low-End Machines
Even with lightweight shaders, optimizing your settings and system can significantly enhance performance. Here are some tips to get the most out of Minecraft shaders on low-end PCs:
Lower In-Game Graphics Settings
- Render Distance: Lowering the render distance is one of the easiest ways to improve performance. Reduce it to a comfortable level where your game remains playable but less taxing on your system.
- Particles: Reducing the number of particles in the game can free up system resources. Set particles to “Minimal” in the video settings.
- Graphics Quality: Switch the graphics setting from “Fancy” to “Fast” to disable some of the more resource-intensive visual effects.
Optimize Shader Settings
- Shadow Quality: Lowering the quality of shadows can significantly boost performance. Some shaderpacks allow you to disable shadows entirely, which can help if your PC struggles with rendering them.
- Water Effects: If water reflections are causing lag, consider turning off or reducing water quality in the shader settings.
- Disable Bloom and Motion Blur: These effects can be visually appealing, but they also require a lot of processing power. Disabling them can help maintain a smoother frame rate.
Use OptiFine
OptiFine is an essential mod for improving Minecraft’s performance. It provides a wide range of settings that can help you balance visual quality and performance. Features like dynamic lighting, fast math, and lazy chunk loading can significantly improve your game’s performance when using shaders.
Update Java
Minecraft runs on Java, so ensuring that you have the latest version of Java installed can help improve performance. The latest version is typically more optimized and secure, leading to better overall performance.
Close Background Applications
Make sure to close any unnecessary background applications that might be using up CPU, memory, or disk resources. This frees up more power for Minecraft to use.
Allocate More RAM to Minecraft
If you have available RAM, allocating more to Minecraft can help the game run smoother. This can be done in the Minecraft launcher under the “Installations” tab, where you can modify the JVM arguments to allocate more RAM.
Monitor and Adjust Performance in Real-Time
Use in-game tools or third-party software to monitor your frame rate. If you notice significant drops, tweak your settings accordingly until you achieve a stable performance.
Benefits of Using Minecraft Shaders
Minecraft shaders transform the game’s simple blocky graphics into stunning, immersive visuals, providing a range of benefits that enhance the overall gaming experience. From improved lighting and realistic water effects to creating a unique atmosphere in your game world, shaders can drastically change how you perceive and enjoy Minecraft. Here’s a detailed look at the benefits of using Minecraft shaders.
Enhanced Visual Appeal
One of the most obvious benefits of using shaders in Minecraft is the dramatic improvement in the game’s visual quality. Shaders add a level of detail and realism that the default graphics can’t match.
Realistic Lighting: Shaders introduce realistic lighting effects, including dynamic shadows, soft lighting, and natural light sources like the sun and moon. The way light interacts with the environment, casting shadows and reflections, adds depth and realism to the game.
Improved Textures: Some shaderpacks enhance textures by adding subtle details such as smoother surfaces and more natural-looking materials. This can make everything from trees to buildings look more lifelike.
Dynamic Weather Effects: Shaders can make weather changes in the game feel more immersive. Rain, thunderstorms, and snow look more realistic, with improved water reflections and particle effects.
Immersive Atmosphere
Shaders significantly enhance the atmosphere within Minecraft, helping to create a more immersive environment that draws you into the game.
Ambient Lighting: The use of ambient occlusion and global illumination in shaders can create mood-enhancing effects, such as eerie shadows in a dark forest or warm, golden sunsets over the ocean.
Color Grading: Shaders can apply various color grading techniques to alter the mood and tone of the game. Whether you prefer a vibrant, cartoonish look or a dark and moody atmosphere, shaders allow you to set the perfect tone for your adventure.
Fog and Mist: Many shaderpacks introduce fog and mist effects that add mystery and depth to landscapes, particularly in forests, mountains, and caves.
Customization and Personalization
Minecraft shaders offer extensive customization options, allowing you to tailor the game’s visuals to your personal preferences. Whether you want a realistic look or a fantasy-inspired world, shaders can help you achieve it.
Unique Visual Styles: Different shaderpacks offer unique visual styles, from hyper-realistic to stylized and artistic. This variety lets you choose the look that best matches your creative vision or the theme of your builds.
Tweakable Settings: Most shaders come with customizable settings, allowing you to adjust elements like shadow intensity, color saturation, water transparency, and more. This flexibility ensures that you can optimize the game’s appearance according to your taste and your PC’s capabilities.
Improved Water Effects
Water in Minecraft can look quite plain and lifeless in the default game. Shaders significantly enhance water visuals, making it one of the most striking changes when you install a shaderpack.
Realistic Water Movement: Shaders introduce fluid water animations that simulate real-life waves and currents. This makes rivers, lakes, and oceans look more dynamic and engaging.
Reflections and Refractions: Shaders can add realistic reflections on the water surface, allowing you to see mirrored images of the environment and sky. Some shaderpacks also include refraction effects, where light bends as it passes through water, adding to the realism.
Transparency and Depth: Shaders can enhance the transparency of water, allowing you to see into its depths more clearly. This can make underwater exploration more exciting and visually appealing.
Enhanced Sky and Celestial Bodies
The sky in Minecraft is greatly enhanced by shaders, offering beautiful, realistic celestial bodies and atmospheric effects.
Realistic Sun and Moon: Shaders can transform the sun and moon into detailed celestial bodies with realistic glow and movement. The sun’s rays can create lens flares, and the moonlight can cast a soft glow over the landscape.
Dynamic Clouds: Unlike the static clouds in the vanilla game, shaders can introduce dynamic, moving clouds with varying shapes and densities. These clouds can change based on the weather and time of day, adding to the immersive experience.
Stunning Sunsets and Sunrises: Shaders can render breathtaking sunsets and sunrises, with rich colors spreading across the sky and reflecting on the landscape. This can make the transition between day and night in the game a visually pleasing event.
Enhanced Shadow and Depth Effects
Shadows play a crucial role in enhancing the depth and realism of the game world. Shaders significantly improve the way shadows are cast and rendered in Minecraft.
Soft Shadows: Shaders can create soft, realistic shadows that vary in intensity based on the light source and distance. These shadows add a layer of depth to the game, making objects appear more grounded and three-dimensional.
Dynamic Shadows: The introduction of dynamic shadows means that shadows shift and change in real-time based on the position of the sun or other light sources. This creates a more lifelike and immersive world.
Performance Customization
While shaders can be demanding on hardware, many shaderpacks allow for performance customization, ensuring that you can enjoy enhanced visuals without sacrificing gameplay performance.
Scalable Settings: Shaderpacks often come with multiple settings options, from low to ultra, allowing players to choose a balance between visual quality and performance based on their system’s capabilities.
Performance-Optimized Shaders: Some shaderpacks are specifically designed for low-end PCs, offering visual enhancements with minimal impact on performance. These options ensure that even players with older or less powerful systems can enjoy improved graphics.
Enhanced Building and Exploration Experience
Shaders can transform the experience of building and exploring in Minecraft, making both activities more enjoyable and inspiring.
Inspiration for Builds: The enhanced visuals can inspire creativity in your builds. The way light interacts with your structures, the shadows they cast, and the overall atmosphere created by shaders can lead to more imaginative and visually appealing creations.
Exploration: Exploring the world becomes a more immersive experience with shaders. From the way sunlight filters through trees in a forest to the eerie glow of lava in a cave, shaders make exploration more exciting and visually rewarding.
Community Engagement and Showcase
Using shaders can enhance your engagement with the Minecraft community, especially when showcasing your builds or creating content.
Improved Screenshots and Videos: Shaders make your screenshots and videos look more professional and visually appealing. This is especially beneficial for content creators who want to showcase their builds or adventures on platforms like YouTube or social media.
Showcase Builds: If you participate in building competitions or share your creations with the community, shaders can help your builds stand out. The enhanced lighting, shadows, and overall atmosphere can make your builds look more impressive.
Frequently Asked Questions
What are Minecraft shaders?
Minecraft shaders are graphical enhancements that modify the game’s lighting, shadows, and textures to create more realistic or stylized visuals. They can significantly improve the appearance of the game, making it more immersive and visually appealing.
Why should I use shaders in Minecraft?
Shaders can transform Minecraft’s blocky world into a visually stunning experience. They add realistic lighting, shadows, water reflections, and enhanced textures, making your gameplay more immersive and aesthetically pleasing.
Can I use shaders on any Minecraft version?
Shaders generally work best with the Java Edition of Minecraft. Most shader packs require OptiFine, which may not be available for every version. Ensure you download shaders compatible with your Minecraft version.
Do shaders affect game performance?
Yes, shaders can significantly impact game performance, especially on lower-end PCs. They require more processing power due to the enhanced graphics. However, there are shader packs designed to be performance-friendly, so choosing the right pack for your hardware is essential.
Can I use shaders with mods?
Yes, you can use shaders alongside mods, but compatibility varies. Some mods may not work well with shaders, or you might experience visual glitches. It’s recommended to check for compatibility or use mods that are known to work with shaders.
Are shaders available for Minecraft Bedrock Edition?
Shaders are primarily designed for the Java Edition. However, some shader-like packs are available for the Bedrock Edition, but they might not offer the same level of graphical enhancement.
Are shaders safe to use?
Yes, shaders are safe to use as long as you download them from reputable sources. Be cautious of malicious files when downloading shader packs, and always scan files for viruses.
Can I create my own shaders?
Yes, creating custom shaders is possible, but it requires knowledge of GLSL (OpenGL Shading Language) and an understanding of how Minecraft’s rendering works. Several communities and tutorials are available to help beginners get started with shader development.
Conclusion
Minecraft shaders offer an incredible way to transform the familiar blocky world into a visually stunning landscape. By adding realistic lighting, dynamic shadows, and enhanced textures, shaders bring a new level of immersion and beauty to your gameplay. Whether you’re exploring vast landscapes, building intricate structures, or simply enjoying the game’s creative freedom, shaders can make your experience more vibrant and engaging.
While using shaders can impact performance, choosing the right shader pack for your system and optimizing settings can ensure a smooth and visually appealing experience. With the right setup, shaders can elevate your Minecraft world, making every moment in the game a feast for the eyes. Whether you’re a seasoned player or new to the game, exploring the world of Minecraft with shaders is sure to enhance your gaming experience in ways you never imagined.